
Whether you’re looking to put a unique touch on your holiday décor, or seeking ways to personalize your holiday gifts this year, start by checking out your neighborhood ReStore!
In addition to an always-changing inventory of gently used furniture, appliances, home décor, and building supplies, ReStore shoppers can find materials to put together any DIY creation. Purchasing your holiday DIY materials from ReStore not only benefits a good cause by helping Habitat for Humanity build homes, communities, and hope – it’ll also benefit your wallet by helping you stick to your holiday budget!
Need a little inspo to get started? Here are 3 DIY holiday décor and gift ideas that were born at the Oakland ReStore and crafted by Patti from Habitat’s Marketing team, and Gus from the Playhouse team! It just goes to show that whether you’re a seasoned carpenter like Gus or a construction novice like Patti, you can craft a fantastic DIY gift at any skill level – and on a budget – with finds from ReStore.
Click to the gift idea that inspires you to get crafty this holiday season:
1. DIY PHOTO COASTERS
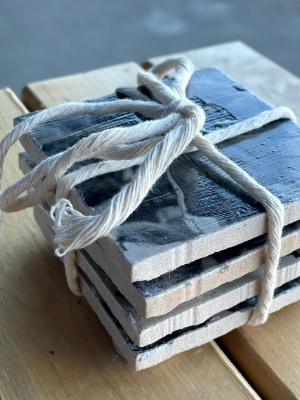
It doesn’t get much more personalized – or easy – than these cute coasters. Photo coasters can be the perfect heartfelt gift for grandparents, new parents, your squad of closest friends, anyone! And the best part is, it can start with just a few dollars spent in ReStore’s flooring section!
1. Gather your materials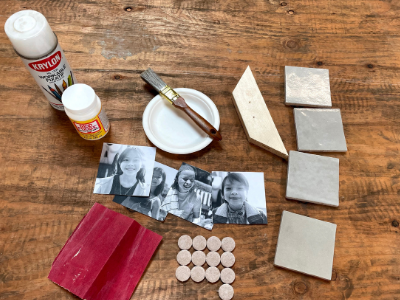
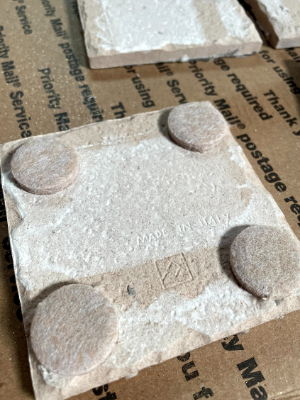
- Tiles from ReStore! We recommend something small, relatively lightweight, and not too heavily textured. Give these a wipe before using!
- Mod Podge Matte
- Paintbrush
- Acrylic sealing spray (like this)
- Felt furniture pads
- Sandpaper
- An object with a firm flat edge – a credit card works great!
- Have some cold water and paper towels handy
- Most importantly, your treasured memories! Measure your tiles and resize/crop some photos to fit. Then, flip them horizontally before printing on a laser printer. This is important because we’ll be transferring these photos in reverse, so you’ll want to flip the image first to ensure that it comes out correctly on your coaster! And, you want to use a laser printer rather than inkjet, because ink tends to bleed in this process, making the resulting photo blurry. Cut the printed photos down to size.
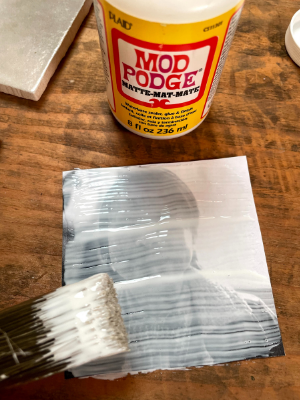
2. Apply your photos to the tiles
Brush a light layer of Mod Podge onto both the top of each tile and the front of each printed photo. Now, flip those photos face-down, and paste them to the tops of your tiles! With your credit card – or other flat-edged tool –smooth out the back of the photo in every direction to make sure you don’t have any air bubbles between your photos and the tiles. Be gentle, so you don’t rip your paper. Then, leave your tiles to dry completely – overnight is safest!
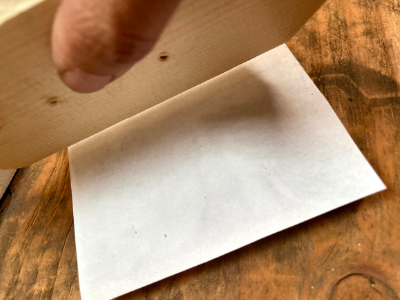
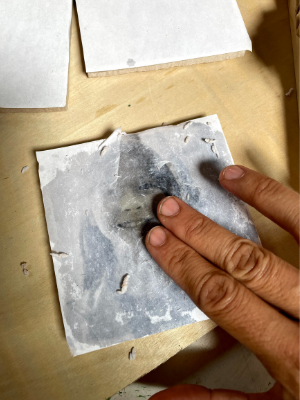
3. Reveal your photos!
Once your photos are dry, time to reveal those memories! Dip a paper towel into cold water, and gently wet the back of each photo. Then, using the paper towel or your fingertips, gently rub the back of the photos until the white paper starts to pill and come away. Keep wetting the paper as needed until your photos are revealed! Remember to be gentle so that you don’t rub away the photos.
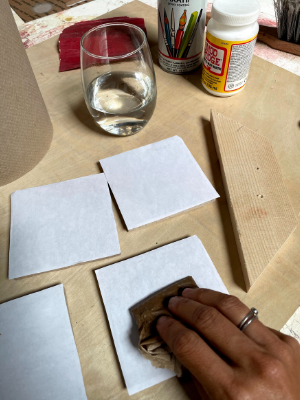
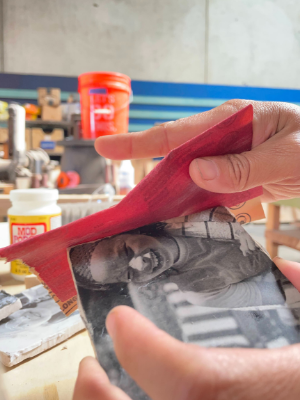
4. Give them a homegrown look
Gently sand around the edges of your photos and tiles to give the photos a homegrown, vintage look. Go slowly so you don’t risk rubbing away too much of your photos.
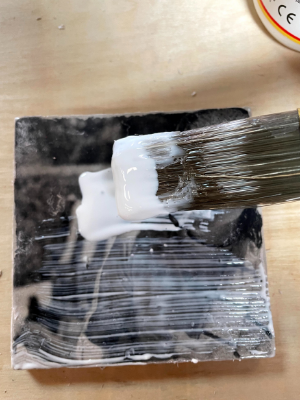
 5. Set your coasters
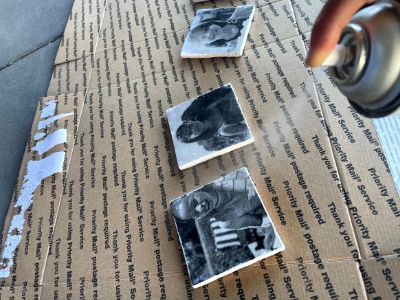
Give your photos another light coat of Mod Podge, then when dry, take them to a well-ventilated area and give them a light spray of acrylic sealant.
6. Give them feet and a bow
To finish them off, attach felt furniture pads to the bottom of each tile to protect the surfaces they’ll be used on. As an alternative, you can also cut felt fabric and hot glue it to the bottom of the tiles. A length of string brings the coasters together in one sweet handmade package!
2. Reverse Canvas
A homemade reverse canvas can be the perfect gift for that person in your life who’s always hosting company, or just anyone who loves the homey feel of a hand-painted piece of art. Plus, our three ReStores have lots of fantastic art on the cheap! For just a few dollars, you could pick up the ideal starting point for your reverse canvas.
1. Gather your materials
Canvas art from ReStore! We got this adorable 12”x12” painted print from Oakland ReStore.
-
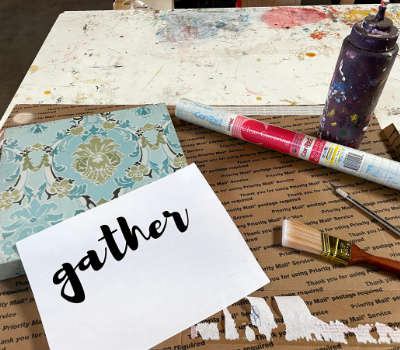
Your sticky stencil: If you’re the lucky owner of a Cricut, this is the perfect Cricut craft, and this part is a piece of cake. You can also visit your local art store to pick up pre-cut vinyl decals. We’re going full DIY here, though, so to do this method, you’ll need:
-
Self-adhesive drawer liner paper (clear)
-
X-Acto blade
-
A printout of your desired design, sized to fit your canvas
-
A safe surface for cutting on
-
-
Paintbrush or foam brush
- Craft or acrylic paint
2. Prepare your stencil
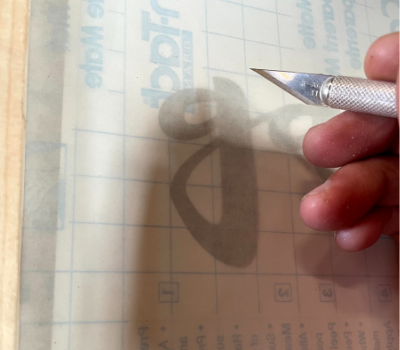
- For our full-DIY method, we are placing the printout of our design underneath the backing of our self-adhesive drawer paper. As you can see, with the transparent paper, the design beneath shows through clearly enough to be traced with an X-Acto blade.
- Carefully cut along the contours of your design with the blade, cutting through both the adhesive liner and the backing.
3. Paint:
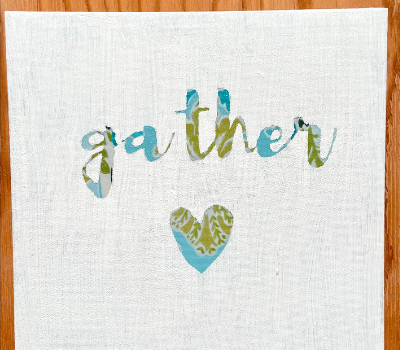
Now, it’s time to carefully peel the backing off of your adhesive cut-outs, and apply the sticky stencil firmly to the canvas. Try to get the edges as securely applied as you can. And, paint! We’ve gone with a white paint so that a hint of the design beneath will show through when it’s dry. Stick with very light layers of paint, and go slowly around your stencil so that the paint doesn’t bleed underneath. It may help to start your brush stroke in the center of the stencil and brush outward over the edges.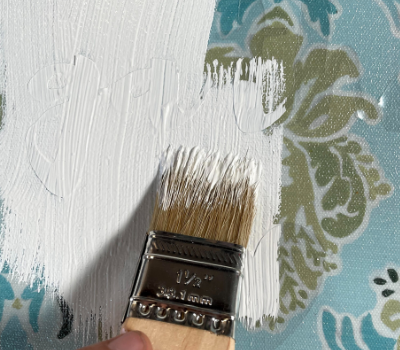 4. Peel
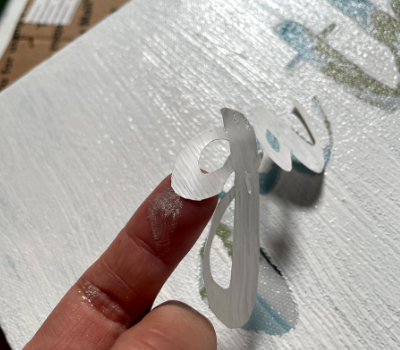
Let the paint sit for a little while so that it’s not too runny, but don’t wait for it to dry completely – or your stencil won’t come off! Carefully lift up a corner of the stencil (the point of your X-Acto blade can come in handy), and reveal your reverse canvas!
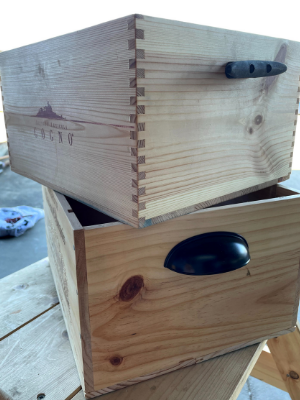
3. Wine Crate Storage
Got a wine lover in your life? We’ve got the perfect craft for you, and it’s about as simple as they come. ReStore often has used wine crates in stock, along with plenty of assorted hardware and fixtures and drawer handles. With just these materials and some simple tools, you’ve got the makings of a sweet light-duty crate with a homemade feel. These boxes come in all shapes and sizes, and can make a great decorative caddy.
1. Gather your materials
- Wine crate from ReStore
- Drawer handles from ReStore
- Fasteners from ReStore (if the handles don’t come with their own hardware)
- Drill
- Ruler
- Small hammer
- Painter’s or masking tape
- Optional: sandpaper in 180 or 220 grit
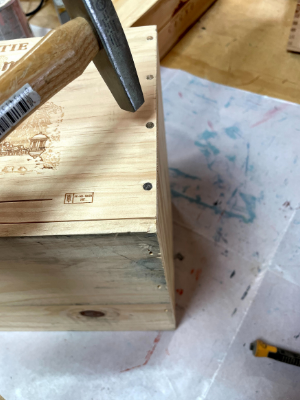
If your chosen wine crate has nails holding the sides together, check to see if any of them are protruding above the surface of the crate. If so, it’s a good idea to embed these firmly with your hammer.
 3. Sanding
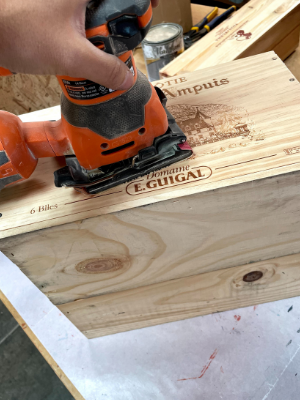 Some crates come with stickers, coating, or markings that you may not want on your finished piece. In our case, this crate had a barcode and a waxy coating that we wanted to sand away. Sand lightly, focusing on markings you’re trying to rid the crate of, while taking care to go gently over areas you want to preserve, like the winery’s art.
Think outside the wine box: While we’ve kept our caddies simple, you could consider applying wood stain or a finish to yours! If so, sanding is a vital first step.
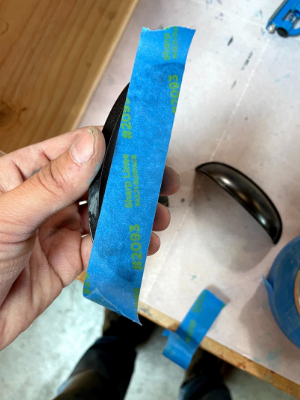
4. Mark the spots for your handles
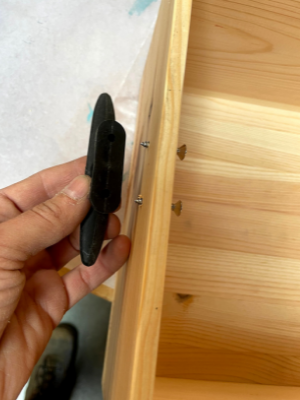
We’ve got a great trick for getting your handles perfectly laid out. First, put a length of painter’s tape or masking tape over the holes on the back side of your handle.
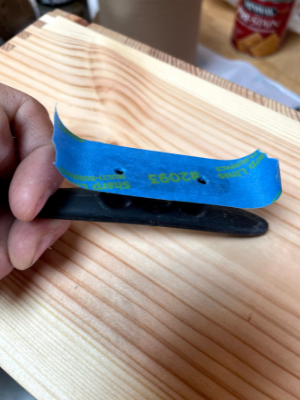
 Now, using a sharp tool like a pencil, punch holes through the tape where the handle has holes for fasteners.
 Now you’ve got the perfect template for placing your handles! Apply the tape to one of the sides of the wine crate where you’d like a handle to go. Use your ruler to ensure that it’s evenly placed.
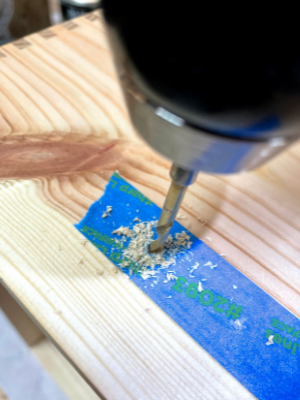
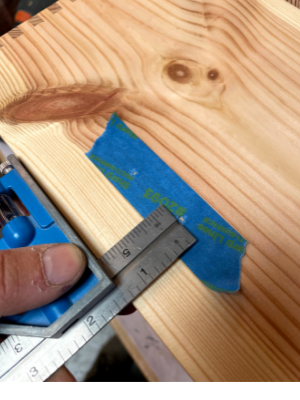 Once you’ve got that tape perfectly placed, pre-drill your holes right through the tape. You’ll want to use a drill bit that’s just a bit bigger than the size of your fasteners. Repeat this on the other side of the wine box, using your ruler to be sure you’re matched up with the first side.
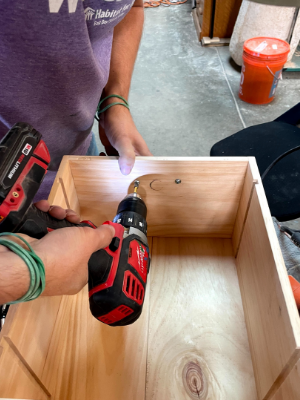
Now, it’s time to finish it up by attaching your handles! Poke your fasteners through the wine box from the inside, and match it up with the holes on each handle. Once you’re properly placed, use your drill to finish the job!
5. That’s it! Now you have a beautiful caddy you can gift for the holidays. While we don’t recommend storing heavy objects in it, it’s just the thing for a carafe and a couple glasses, a stash of remote controls, or decorative items!
Join the Conversation
Leave Us a Comment!
We love hearing from our community. Let us know what you think by leaving us a comment below.